Overview
This article describes the options for customizing and overriding “system” emails that are sent based on data transactions on the website.
Locating The Configuration
The location within the worker portal varies depending on if you have self-service email templates and/or per-customer site emails emailed. Follow these steps to locate the location of the email settings:
- Go to Settings Workspace > Customer Site Settings > Customer Sites
- Select the Edit link for the site the emails are for
- Go to the Emails tab to configure the email settings for that site (see screenshot)
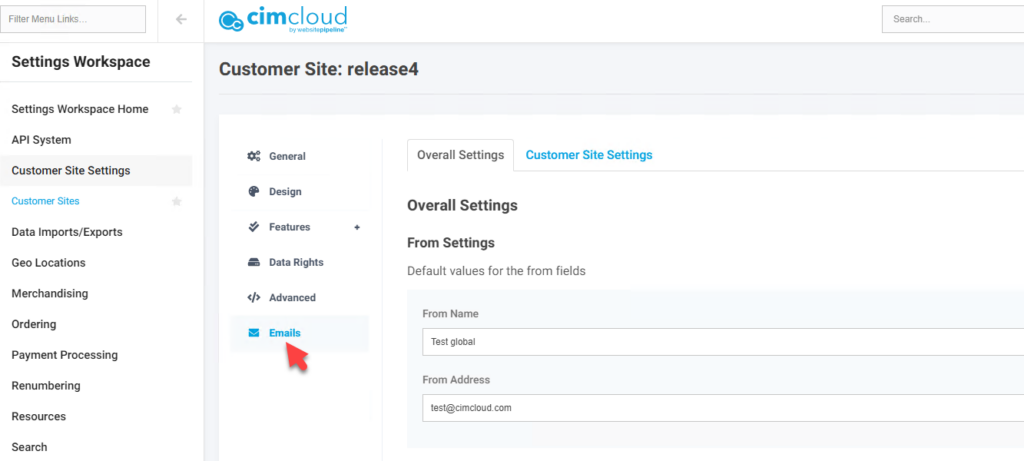
- These settings are covered in the “Email Settings Under Customer Sites” section later in this article.
- If you do not see an Emails tab
- To update the primary site’s settings go to Settings Workspace > System-Wide Settings > Email Settings. These settings are covered in the “Email Configuration Under System-Wide Settings” section later in this article.
- To update a specific Customer Site settings (other than the primary site) you will need to contact CIMcloud. This currently needs to be enabled by CIMcloud and the site migrated to this new process. The current plan is for this to be the process for all sites in the future no matter if there are multiple customer sites or not. If you would like to use this process please contact CIMcloud via an extranet ticket.
Configurable Email Fields
These fields can be changed for all system emails:
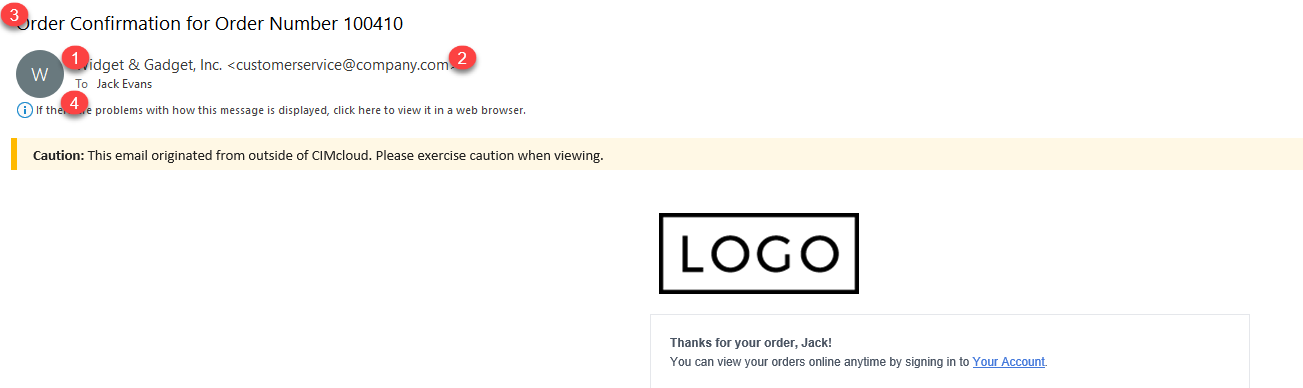
- (1) From Name – This is the value that appears at the top of the email as the sent from
- (2) From Address – This needs to be a valid email address and be associated with one of the domains the emails on your site are being associated with.
- (3) Subject Line – This is the subject line of the email. You are able to update this and this can use tag replacements. Tag replacements allow specific values that have been configured to to appear as part of the subject line. These are formatted with <>. For example the standard Order Confirmation subject line is Order Confirmation for Order Number <c_ordnum>. This is using tag replacement for the order number so when the email is actually generated you will see the actual order number instead of <c_ordnum>. There is currently a very limited list of available fields per email for tag replacement and most are already built into the standard email subject lines.
- (4) CC Addresses – This will add the email addresses entered here as a CC on all of this specific email. If you want a specific person or inbox to receive copies of all order confirmation emails and want the recipients to see these then enter the email address(es) in this field. If entering multiple values then enter as semicolon delimited.
- BCC Addresses– This will add the email addresses entered here as a BCC on all of this specific email. If you want a specific person or inbox to receive copies of all order confirmation emails and want the recipients to not see these then enter the email address(es) in this field. If entering multiple values then enter as semicolon delimited.
- To Address – Is on the page but currently this is not something you can override. This will be coming soon.
- Logo – The print logo under Customer Sites > [site] > Design tab
- Address – The address under the Customer Sites > [site] > General tab
Email Settings Under Customer Sites
Tip: Don’t see the Emails tab? Review the “Locating The Configuration” section above to confirm that the customer site email feature has been enabled.
The settings under Settings Workspace > Customer Site Settings > Customer Sites > Edit > Emails can be used to configure each system email on a customer site basis including. When you navigate here you will see a page with two tabs at the top. One is for Customer Site Settings and the other for Overall Settings. Under each you will see options at the top for the two From settings. Below these are the specific emails where you can populate the values for specific emails. The fields will show the current values being used for the specific email. You will not see the button to save a specific change until you start putting in or changing a value.
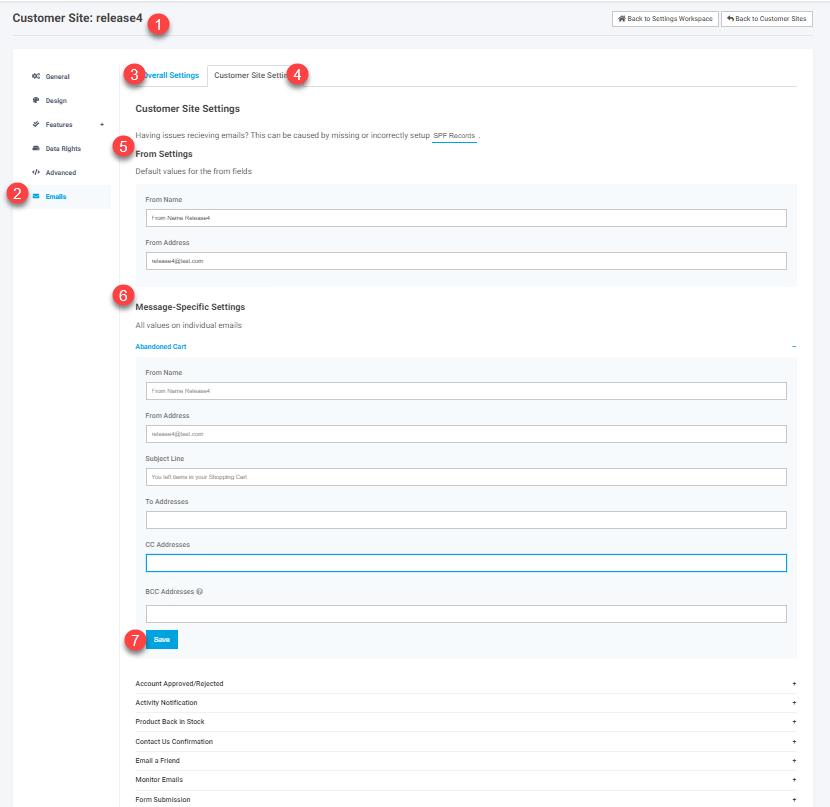
- Customer Site – this is the specific customer site record being edited
- Email tab – This is the email tab to see these settings
- Overall Settings tab – This is where you can go to see settings for emails to apply to all sites (unless overridden at a lower level). You will see these same values when navigating to any customer site. This tab will look just like the Customers Sites Settings tab shown.
- Customer Site Settings tab – These are the values that will apply to this specific customer site.
- From Settings – These are values to apply to all emails on this customer site unless set differently on a specific email
- Message Specific Settings – In this case the Abandoned Cart email was selected to expand to see the available fields. The two From fields and the Subject Line show the current values being used for this site and this email. They are slightly greyed out and when selected you can only type over them and not edit them because these are defaulting from higher levels. The From fields are set specific for this site and the Subject Line is defaulted from the Overall Settings. If the values were set for this specific site and email you would be able to edit the value.
- Save – This is showing because a value has started to be typed into one of the fields for this email.
Each value is applied based on a hierarchy so that common settings can be reused but then overridden in specific places. The first value found in this settings hierarchy is used:
- Customer Site Settings > Message-Specific Settings
- Customer Site Settings > From Settings [only available for: From Name, From Address]
- Overall Settings* > Message-Specific Settings
- Overall Settings* > From Settings [only available for: From Name, From Address]
* The Overall Settings applies to all customer sites.
Example
You want most emails to be sent from XYZ Company (CustomerService@XYZ.com) however the Order Confirmation email should be set from a different address: XYZ Sales (orders@xyz.com).
- On the Overall Settings tab under any Customer Site (because the settings are shared), set the From Name and From Address to “XYZ Company” and “CustomerService@XYZ.com”
- Then, under Message-Specific Settings > Order Confirmation, set the From Name and From Address to “XYZ Sales” and “orders@xyz.com“