Overview
This article reviews the steps required on the CIMcloud platform when renumbering products or customers in the ERP. Without following these steps you can create new records in CIMcloud for products and/or customers that are not tied to the proper pricing, data segregation, images, history,…. and leave orphaned records that are no longer syncing with the ERP.
Due to some ERPs (like Sage100) not using unique keys for products and customers, CIMcloud has to use an existing attribute that is unique to the product or account (ERP customer) to identify the record when information syncs. For products this is the value that is the SKU (Sage100 itemcode) and for account the ref_id (sage100 division code, dash, and the cusotmerno. example 00-123456). When one of these values changes in the ERP and CIMCloud is not updated through this process, the old record is orphaned and a new record created that is not tied to other records like pricing, inventory, addresses, logins, order history,… based on the new SKU or Ref_id being created through the ERP sync. This can lead to records displaying to end users that are not configured properly. Most ERPs will need to run this process for products. There are some ERPs that will not need to do this for accounts. If you are updating account numbers in the ERP and you are not Sage100, check with Customer Success through the CIMcloud ticketing system to verify if you need to run this process for customer renumbering in the ERP.
This article reviews the process needing to be followed in CIMcloud at the same time the records are updated in the ERP to keep records properly in sync. This does require the ERP sync services to be stopped prior to either the ERP or CIMcloud being updated and not turned on until updates are complete in both. The website is still available and working at this time it is just not syncing/updating.
Process
The general process is:
- Enable Renumbering for all workers or specific worker group(s) in the CIMcloud application
- Turn off CIMcloud ERP sync services
- Update ERP
- Add records with old and new sku and/or account ref_id to a list in CIMcloud to run the update on.
- Let a CIMCloud process run to update CIMcloud records from the list
- Verify the record changes in ERP and CIMCloud.
- Turn the CIMcloud ERP sync services back on
After step 6 above the ERP and CIMcloud records should now match so that when things start syncing again the values will match between the ERP and CMCloud.
Here is additional information on each of these steps.
(1) Enable Renumbering
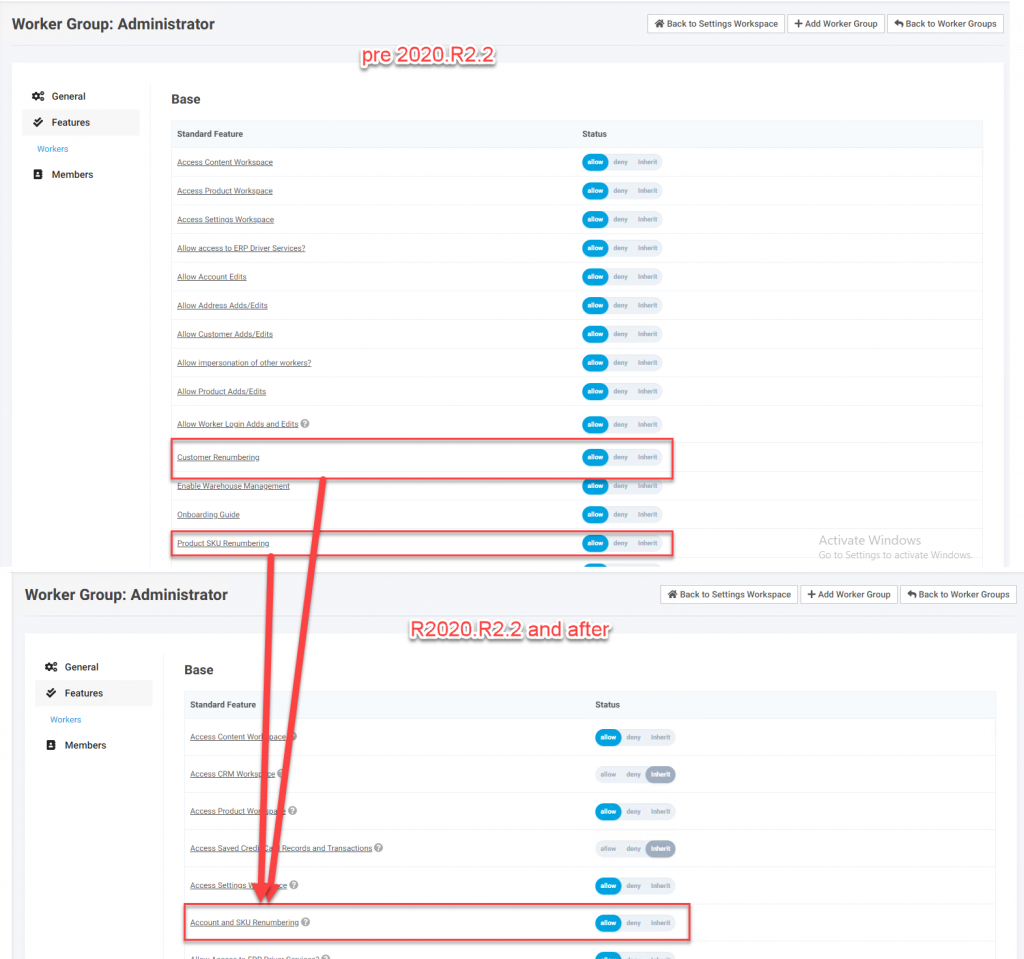
Prior to version 2020R2.2 there may be two features in workspace settings. One for Product Renumbering and one for Customer Renumbering. Since these two options were doing the same thing they were combined in 2020.R2.2. Enable one of these options for the worker group you want to have access to this feature.
This enables the menu for these users and enables the process that runs every 5 minutes looking for records that have been added to be renumbered in CIMCloud.
(2) Turn Off ERP Sync
The ERP sync needs to be turned off prior to updating the records in the ERP to make sure records do not sync while CIMcloud is being updated and the ERP is updated. If the sync were running then if a record did sync before both were updated a new record would get created verses only updating the existing record.
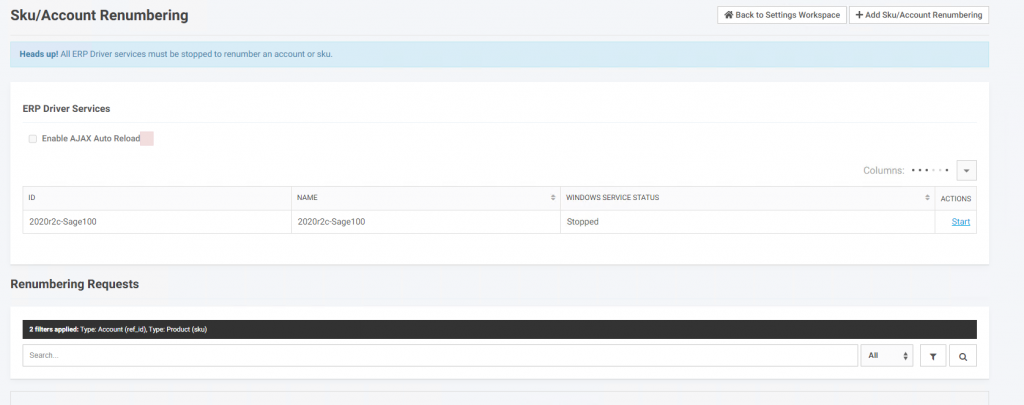
Turning off the sync can be done through the Renumbering pages. Go to Settings Workspace > Sku/Account Renumbering. The services will be at the top of the page. You will not be able to add records through the U/I until the services have stopped.
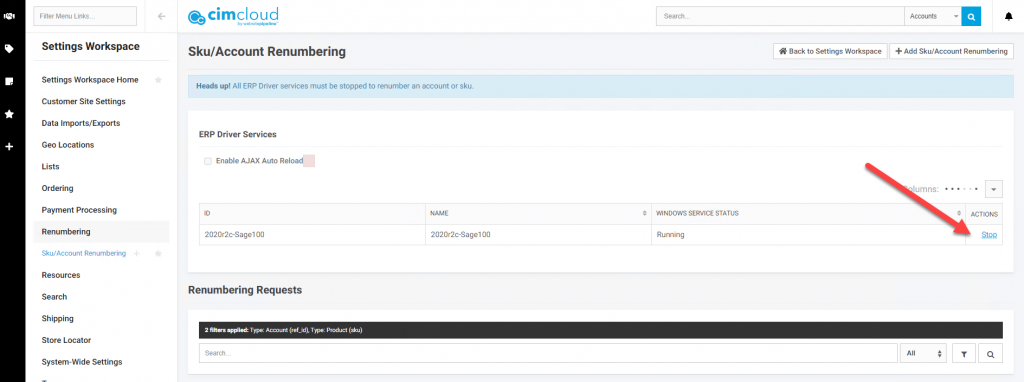
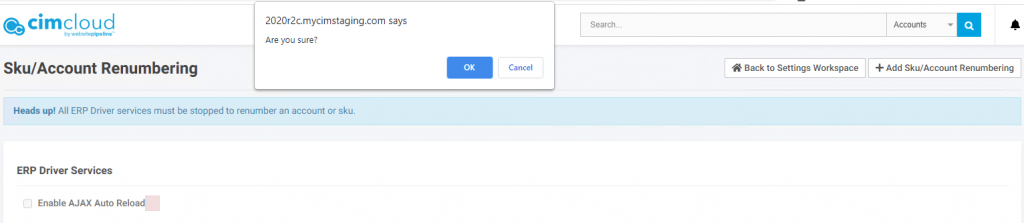
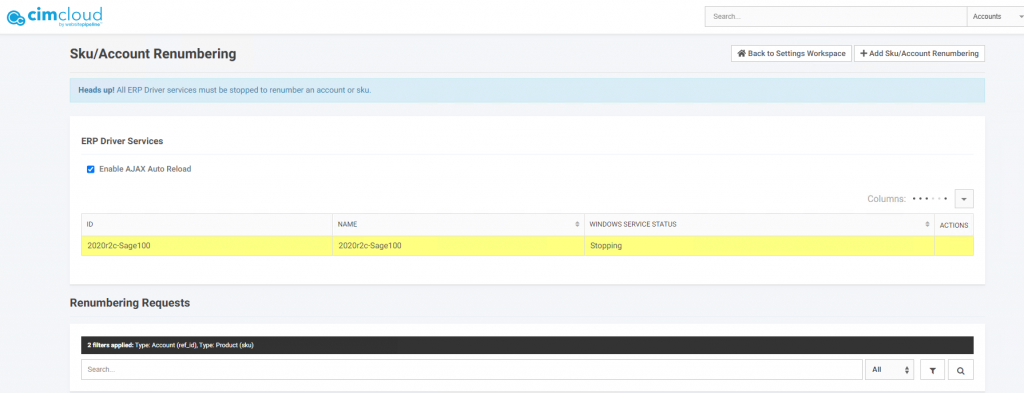
After you select stop. A pop-up at the top of the page will have you verify the action. Once the sync is stopped all information between Sage and CIMcloud will stop syncing until the process is complete. The website is still available just data is not updating between CIMcloud and the ERP. After you verify you want the services stopped the service will go into a status of “Stopping” until the system reports back that the services are stopped on the ERP server. Once the services are stopped you can proceed to the next step. It may take several minutes for the serrvices to stop.
(3) Update ERP
Now that the services are stopped you can renumber the items and/or customers in the ERP
(4) Add records for processing in CIMcloud
The following goes through adding records to be updated through the U/I. If you have a large number of records this can be done with a spreadsheet upload. Information on uploading the information with a spreadsheet can be found at the end of this article.
Note that if you try and add records through the U/I without first stopping the services you will not be allowed.
At the top of the renumbering page click on +Add SKU/Account Renumbering

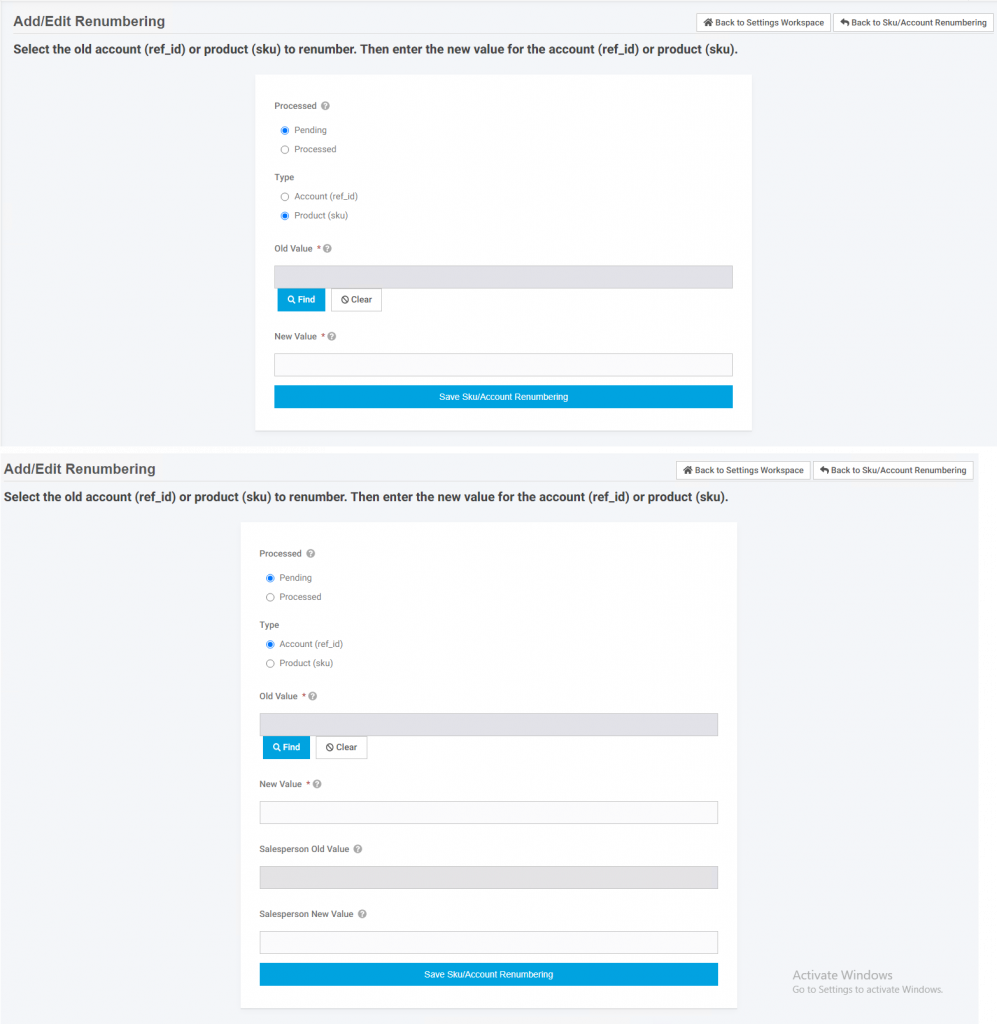
If services are stopped you will get the page to add a customer/account or item/SKU update record.
The record will default to processing so the system will process the record. Leave it at Processing.
Chose Account or Product depending on what you are updating.
For products you want to look up the existing product/SKU for the Old Value and then type in what this SKU is being renumbered to in the New Value.
For Accounts you want to look up the existing account for the Old Value and then enter the new ref_id (division dash customerno for Sage100) as the New Value. For Sage100 this new value needs to include the division code so will be in the format 00-123456. Other ERPs may not need this process for accounts if the account ref_id is the same as the ERP customer key in the ERP. Check with customer success prior to updating accounts for non sage100 ERPs. If the account in Sage100 is switching divisions you will also need to enter a new salesperson number, since the salesperson number in CIMcloud is prefixed with the division code like the account. Only enter a new salesperson if the division or value is changing.
(5) Let CIMcloud Update Process Run
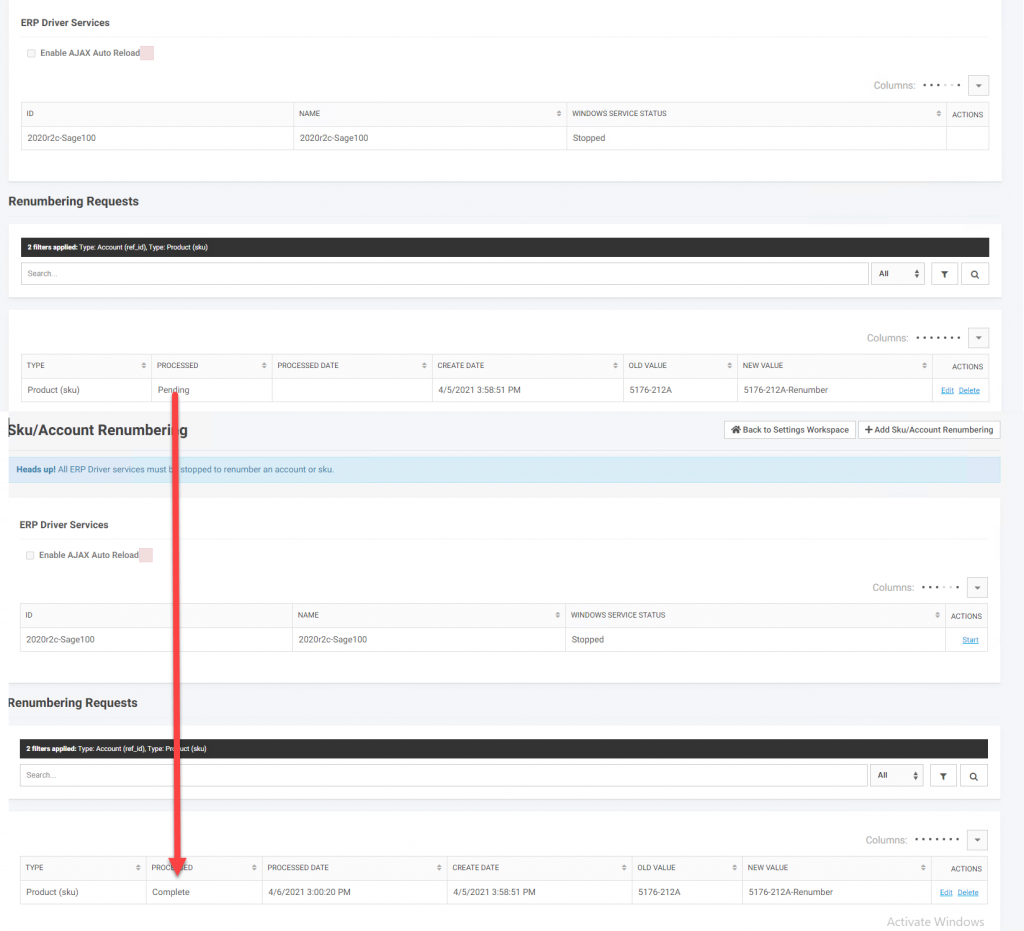
After the records have been added you will see them on the main page below the services. It is possible records will process as you add additional records, this is fine. A process runs every 5 minutes to update the records. After a record processes it will change from Pending to Complete in the Processed Column. You can proceed to the next step after all records have been marked complete. The system will not allow services to be restarted until all records have been processed.
(6) Verify updates
At this point it is recommended that you look at the updated records in the worker portal and the customer site(s) and verify the update looks as expected. Doing so after the sync is turned on may cause duplicate records and records with bad information if the update did not update as you expected.
(7) Turn the ERP Sync Back On
After the ERP has been updated, all the records have processed in CIMcloud, and you have verified the updates in CIMcloud you can turn the sync back on. At the top of the page click on “Start” next to the service, and the services will go through the starting process much like when services were stopped. You will need to verify your request. You will see the status change to starting, and then when complete you will see the service(s) as running. At this point the ERP and CIMCloud should match for these updates and any updates associated with the renumber item/customer in the ERP will update the renumber product/Account in CIMcloud.
Uploading Updates Verses Manual Entry
If you have a large number of items being updated you can create the records in CIMCloud through a spreadsheet upload verses manual entry. Services should be stopped before doing this upload. If not, then records could be duplicated and orphaned. Shortly after the upload is complete CIMcloud will process the update. The uploaded records will be available for review and to see the processing status on the Renumbering page noted above as if they were manually entered through the U/I. A sample csv upload is provided below.
The upload should be done to the field_value_updates table.
The fields to populate:
old_field_value – this is the value before renumbering. This is the record that will be updated. For products this is the SKU value (Sage100 itemcode). For accounts this is the ref_id value on the website (Sage100 division dash customerno – 00-123456)
new_field_value – This is the renumbered value that the previous field is being updated to. For products this is the new SKU value (Sage100 itemcode). For accounts this is the new ref_id value on the website (Sage100 division dash customerno – example – 10-987654)
processed – This should be set to 0 (a zero) to indicate the record has not been processed yet.
type – This should be product-sku for sku renumbering or account-ref_id for customer renumbering. If these values are not set or do not match they will not be picked up by the CIMcloud process.
salesperson_new_value – if the customer is changing divisions this should be the new salesperson value in the same division and should include the division code. For example 10-HOUS.