Overview
The purpose of this article is to explain how to create the Sage 100 user for our sync tool with the appropriate permissions.
Creating the User Role
To create the role for the user, go into Sage and under role maintenance, create a new role for WSP. It should have, at minimum, the following permissions selected:
-
- For Tasks: Every option under Accounts Receivable, Common Information, Inventory Management, and Sales Order are checked.
- For Security events: Every option under Accounts Receivable, Common Information, Inventory Management, and Sales Order are checked.
- For Module options: Every option under Accounts Receivable, Common Information, Inventory Management, and Sales Order are checked.
- For SData Security (if it is used): Every option under Accounts Receivable, Common Information, Inventory Management, and Sales Order are checked.
- For ODBC Security (if it is used): Every option under Accounts Receivable, Common Information, Inventory Management, and Sales Order are checked.

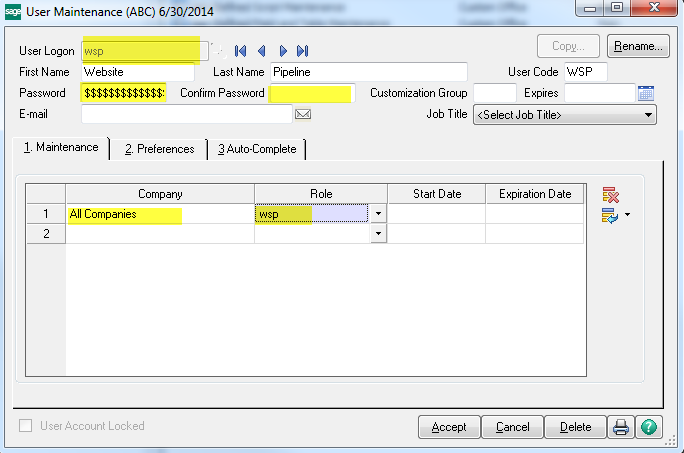
Creating the User
Once this is done, create a new user by going to User Maintenance and creating a new user and password, using the role from above. The password for this used should be at least 25 characters long.
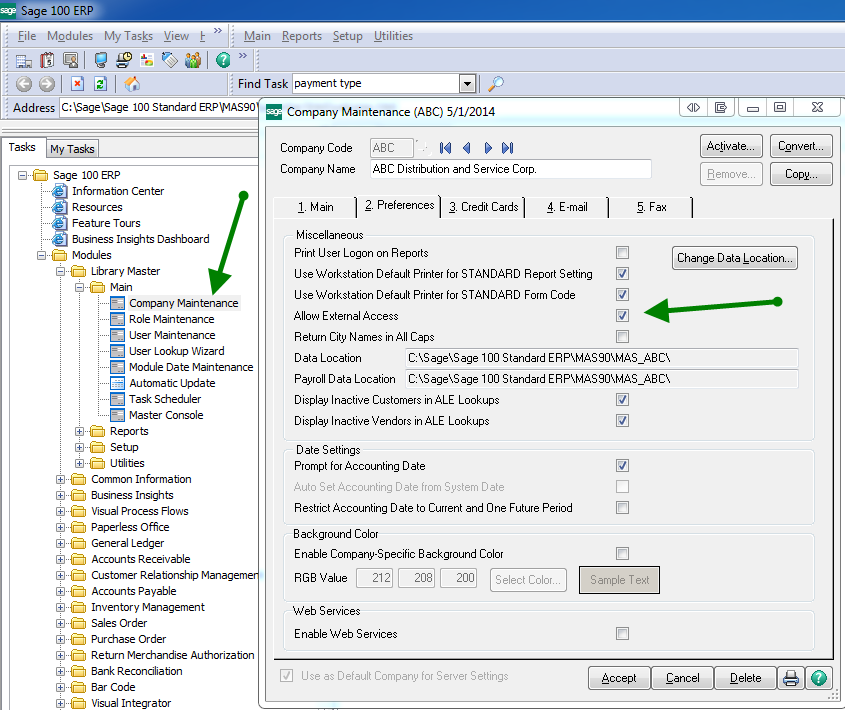
Verify External Access
Verify that “Allow External Access” is checked under Company Maintenance for the Company Code(s) that will be used by the tool.