Overview
This article gives a detailed overview of Design Settings in CIMcloud. All design settings are available to customer sites that have no (or limited) design customizations. A more limited subset of settings are available to customers with heavily customized sites.
Settings are available for logos, favicons, fonts, landing page customizations (retail only), featured products (retail only), marketing sections (retail only). Preview windows show color updates in real time so the user can see how a change will affect their website.
To further customize your site’s design, you are able to use the “Advanced” section within your Customer Site Settings. We cover this in an article, outlining what you can achieve, and what you should be aware of with this feature.
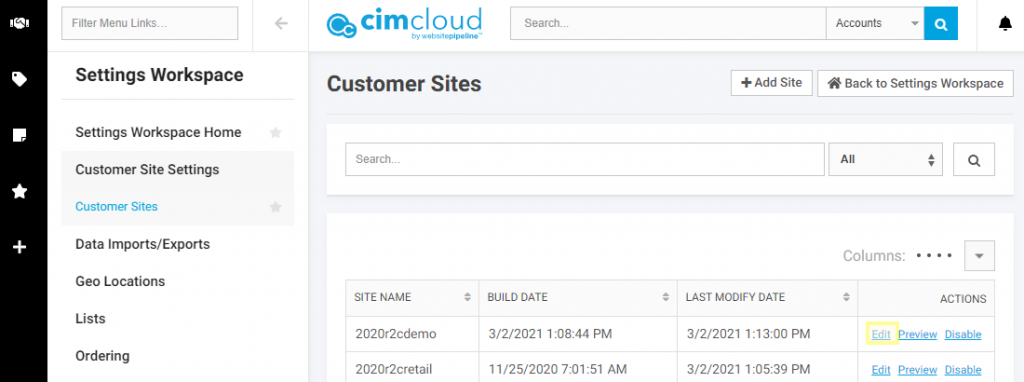
Design settings can be found by navigating to the customer sites manage page in the settings workspace under the customer site settings menu item. Then select the edit link on the site you want to change the design settings for. Once the settings page loads select the design tab on the left.
Global Images
Default Print Logo
Sets the logo that will be displayed on any printable pages. Usually this can be the same as the Retail/Dashboard Header Logo, so long as the logo is not white, or too light for a printer. This is also the logo used on emails.
Default Favicon
The regular icon file for displaying a logo in a browser tab.

Small & Large Favicons
Alternative favicon files for browser compatibility. Usually a good idea to add favicon png files at this size specification. https://favicomatic.com/ is an excellent resource for generating favicon files.
Retail/Dashboard Font Stack
Retail Google Font Stack
CIMcloud will automatically load any font from https://fonts.google.com/. Note the format for the font family: Font+Name:400,700;Another+Font:300,500,600
This adds the fonts and specified font weights to your website. Be sure the name of the font is capitalized with a + between words (see the example above).
Retail Logo Settings
Retail Header Logo
Add a logo to the navigation bar of your website.
Retail Header Logo (Mobile)
The version of your header logo designed for mobile devices.
Retail Footer Logo
Add a logo to your footer.
Retail Footer Logo (Mobile)
The version of your footer logo designed for mobile devices.
Dashboard Logo Settings
Dashboard Login Portal Logo
Add a logo to the login screen of your B2B Portal (does not apply to the Worker Portal).
Dashboard Header Logo
Add a logo to the navigation bar of your B2B Portal (does not apply to the Worker Portal).
Dashboard Header Logo (Mobile)
The version of your header logo designed for mobile devices.
Retail Landing Page Settings
Settings dedicated to making minor image, html, and style modifications to the retail landing page.
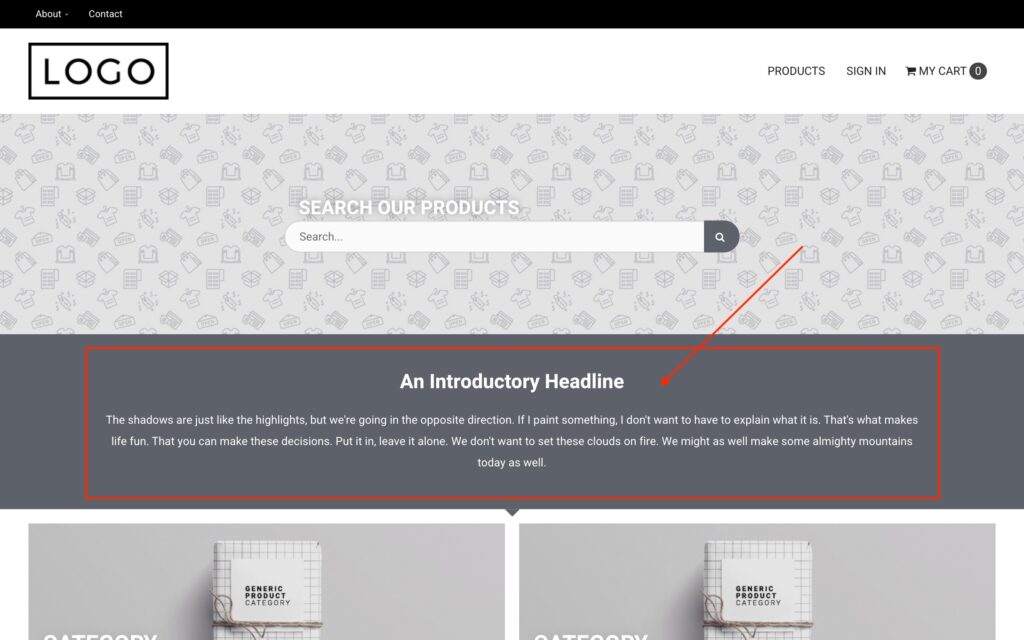
Hero Image
Image for the banner section of the landing page. The recommended size for the hero image is 1920×400 JPEG, no larger than 200 KB.

Home Page Intro Text
Certain sections, like this one, use a markdown editor to edit the html of a particular area of the landing page. While it is possible to use the editor as a document, like a Word document, it’s recommended that the Source Code editor (denoted by the <> symbol) is used.
IMPORTANT NOTE: When using the markdown editor, it’s highly recommended that source code be edited in a separate editor, such as Visual Studio Code, and a backup be made before saving any new changes. CIMcloud is not responsible for any lost content.
This can be used to edit the introduction text of your landing page. Refer to the Color Settings to change the background color.
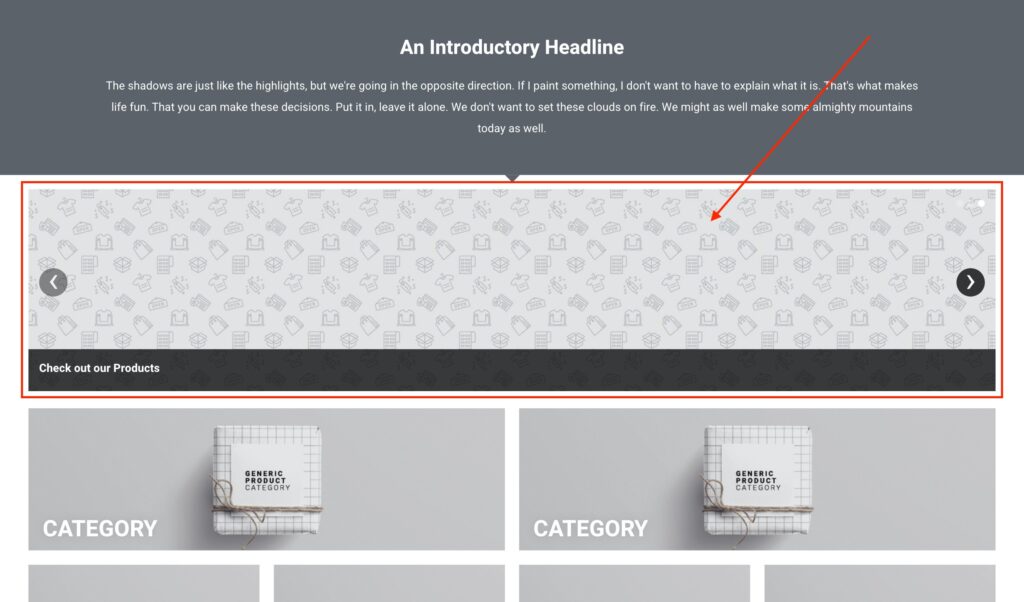
Slide Show
Add a slideshow below the hero section of your landing page. Content for slideshows can be edited on the Slide Shows edit page.
Home Page Category Section
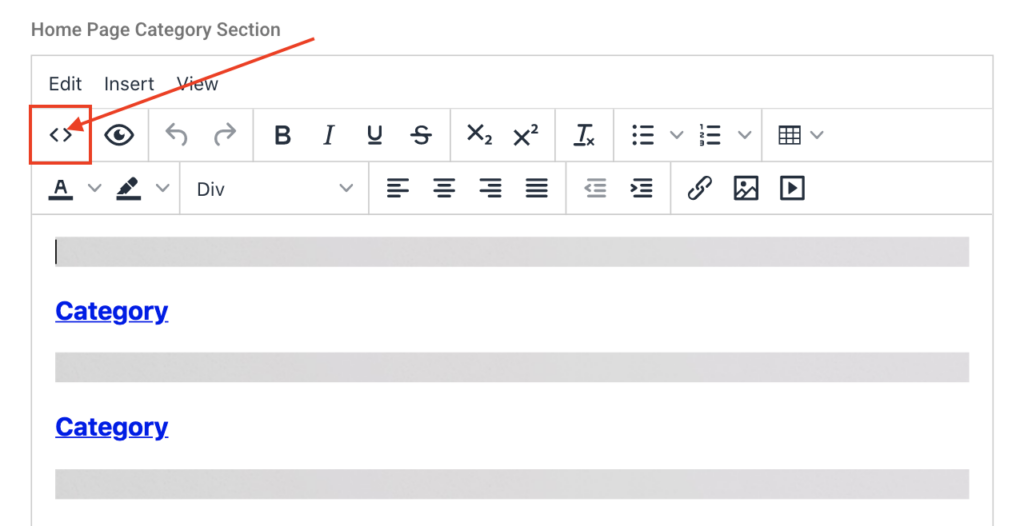
Certain sections, like this one, use a markdown editor to edit the html of a particular area of the landing page. While it is possible to use the editor as a document, like a Word document, it’s recommended that the Source Code editor (denoted by the <> symbol) is used.
IMPORTANT NOTE: When using the markdown editor, it’s highly recommended that source code be edited in a separate editor, such as Visual Studio Code, and a backup be made before saving any new changes. CIMcloud is not responsible for any lost content.
The Home Page Category Section is a pre-built marketing section, typically used as quick/featured links for product categories and/or content pages.
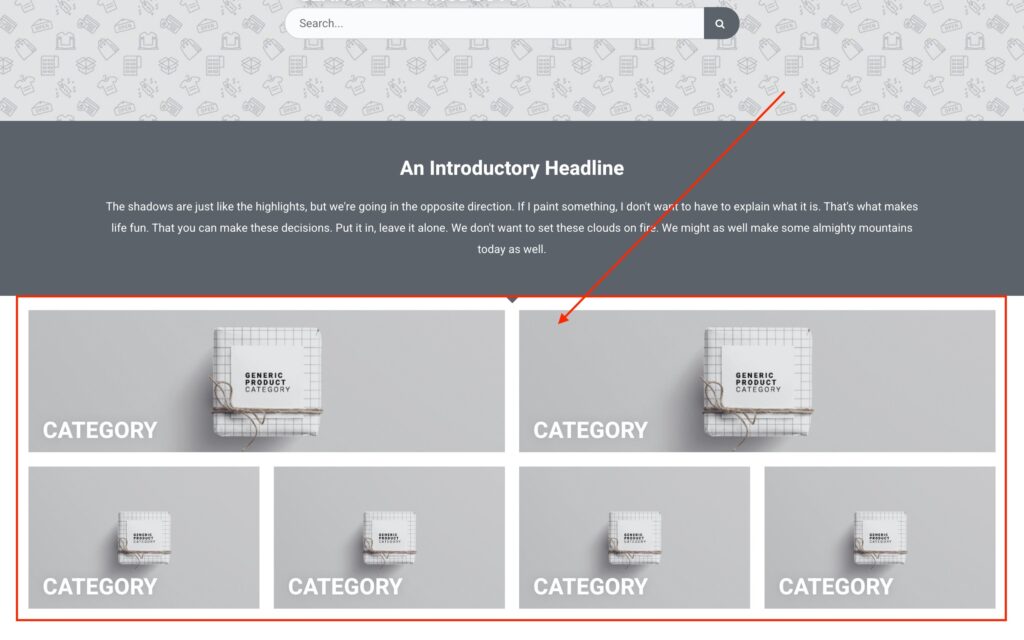
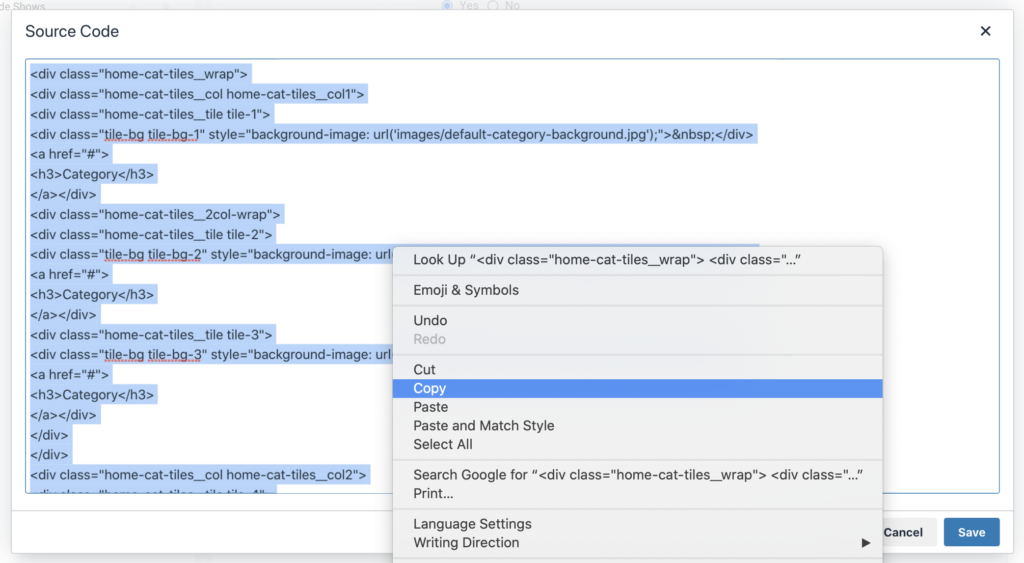
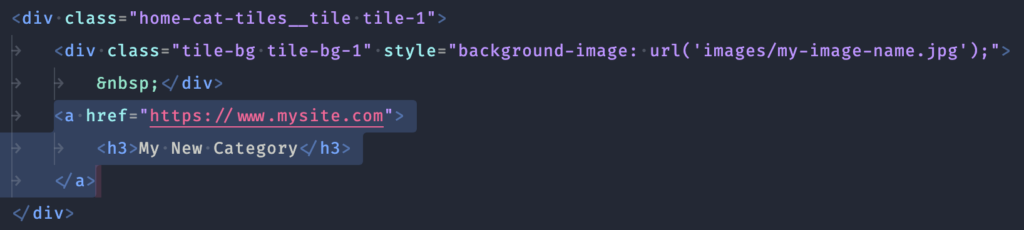
Most customers prefer to use the current layout of the Category Section as-is, only changing the images, text, and links. To do this, first open the source code (figure 11) and copy it (figure 12) to a code editor (figure 13) of your choice.

You can save this copied file as a backup before making changes.
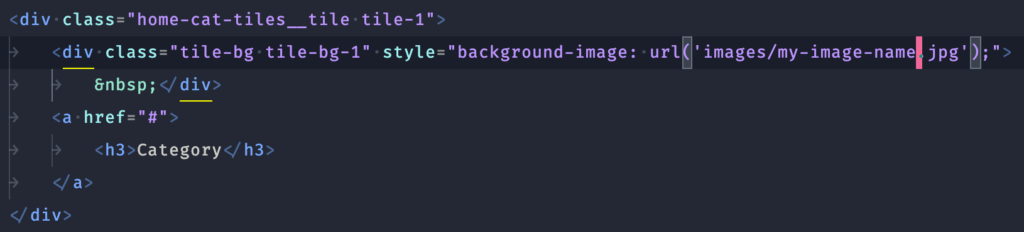
NOTE: If you want to change background images, tile links and titles/text, be sure to only change those pieces of code. Do not delete classes, or change tag names. This may cause unexpected results.
Update the background images by replacing them with an image you’ve uploaded to CIMcloud’s Images and Files.
The tiles are ordered as such:
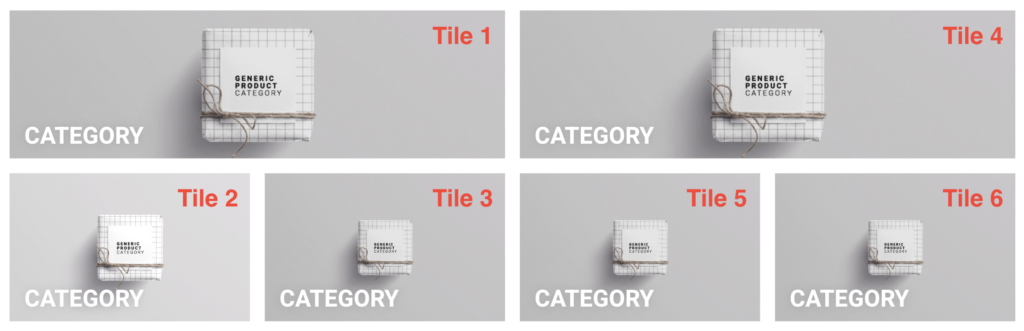
Also change the href (URL) and tile name.
Once this is accomplished, copy everything from your code editor and paste it back into the source code window of the Design Settings markdown editor and save.
More advanced users can create whatever content they want with the markdown editor, and use style tags for custom CSS.
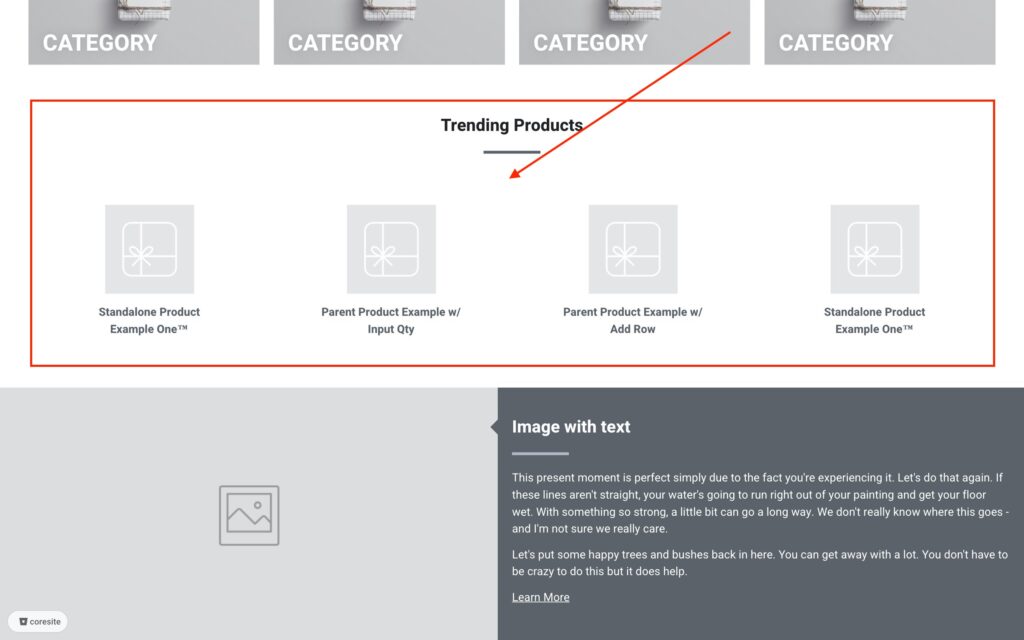
Show Featured Products on Home Page
Setting to display a carousel of featured products on the landing page.
Show Pricing on Featured Products
Show the price in the featured products carousel.
Featured Products Heading
Change the title above the featured products carousel.
Home Page Footer Section
Certain sections, like this one, use a markdown editor to edit the html of a particular area of the landing page. While it is possible to use the editor as a document, like a Word document, it’s recommended that the Source Code editor (denoted by the <> symbol) is used.
IMPORTANT NOTE: When using the markdown editor, it’s highly recommended that source code be edited in a separate editor, such as Visual Studio Code, and a backup be made before saving any new changes. CIMcloud is not responsible for any lost content.
The Home Page Footer Section is a pre-built marketing section, typically used as call to action, or company information section. Refer to the Home Page Category Section for more information on how to edit a section like this.
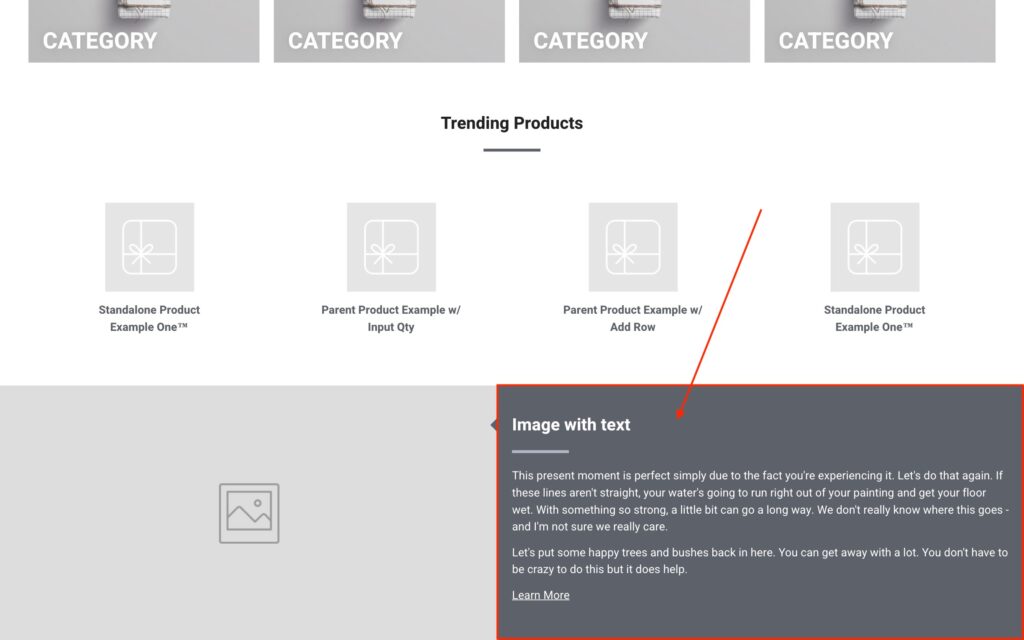
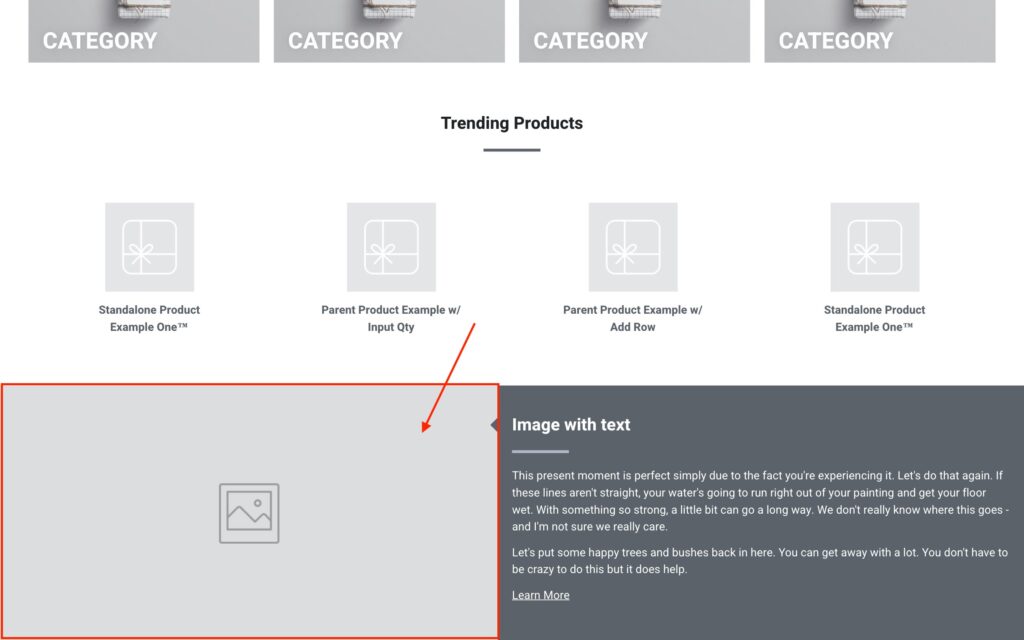
Footer Image
This is the image beside the Home Page Footer Section.
Home Page Footer Bottom Text
Certain sections, like this one, use a markdown editor to edit the html of a particular area of the landing page. While it is possible to use the editor as a document, like a Word document, it’s recommended that the Source Code editor (denoted by the <> symbol) is used.
IMPORTANT NOTE: When using the markdown editor, it’s highly recommended that source code be edited in a separate editor, such as Visual Studio Code, and a backup be made before saving any new changes. CIMcloud is not responsible for any lost content.
Enter custom footer html here. For example, you can paste in a 3rd party email campaign form.
Retail/Dashboard Color Settings
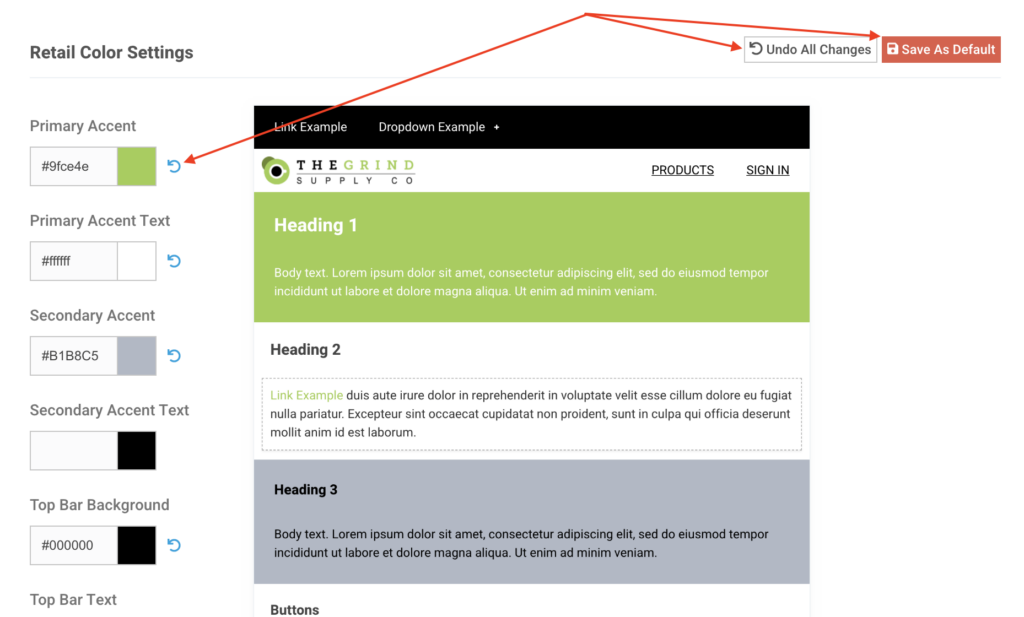
When using CIMcloud’s default template, color settings are available to adjust the color palettes of both Retail and Portal/Dashboard sites. Preview windows are available to see color changes in real time. Each color picker (excluding hover colors) will highlight the section of the preview window that color will apply to (figure 20). Some colors, like text, will automatically adjust to black or white depending on the background color to preserve ADA compliance, but only when the input is left blank (figure 21).
Once a color palette has been chosen, it can be saved as the default palette. You can then revert your colors by using the undo icon beside a color, or undo all your changes.