Overview:
Images and document files can be uploaded for use on customer sites in the Worker Portal to be used for a variety of reasons, mainly to embed images for products and PDF files for customers to view. To add images or documents to products, product categories, slide shows, retail homepage, or any other place on the site they must first be uploaded to the site using this process, and then each of the different entities (products, product categories, etc..) need to be pointed to the uploaded files.
For guidance on image specifications for difference images check out this article: Image Management Guidelines
Step-by-Step Process:
To upload an image or document in the Worker Portal, the worker should navigate to:
Content Workspace → Content → Images & Files
Here the worker can view the folders that they can place the image or document in. The worker will then click the folder they would like to upload to. Once the worker clicks the link for the folder, they are brought to a page that lists all sub-folders and images/documents that belong to the folder they clicked.
To create a new sub-folder, they can click the ‘Create Folder’ button.
Note: If images are placed in subfolders then the the folder structure needs to part of the path when pointing to the image from products, product categories, etc..
To upload a file or a document the worker will click the ‘Upload Files’ in the top right corner.
When clicked, a modal dialogue will appear. The first step is to click the ‘Choose a File’ button. The next step is to choose the file (image or document) that is to be uploaded. Once selected, on the modal dialogue, click the ‘Upload’ button. After this process is completed, it can take up to 2 minutes to see the image or document appear in the Worker Portal. The worker can press the ‘Refresh’ button at the top of the page to refresh and see if the image or document has been fully processed and is now accessible.
In addition to uploading an individual file you can upload a zip file containing multiple images. When uploading a zip file of images it is important to check the folder structure of the zip file as this folder structure will be created as part of the zip file upload. The folder structure will also be appended to the folder you are in when uploading.
NOTE: It is recommended to do a small sample the first time when uploading images to verify the things upload as you expect before doing a large volume of images at one time.
NOTE: There are limits to the size of a zip file that can be uploaded to the site at one time. This is based on an overall time to process the upload. It is recommended to keep an individual zip file size under 150 MB.
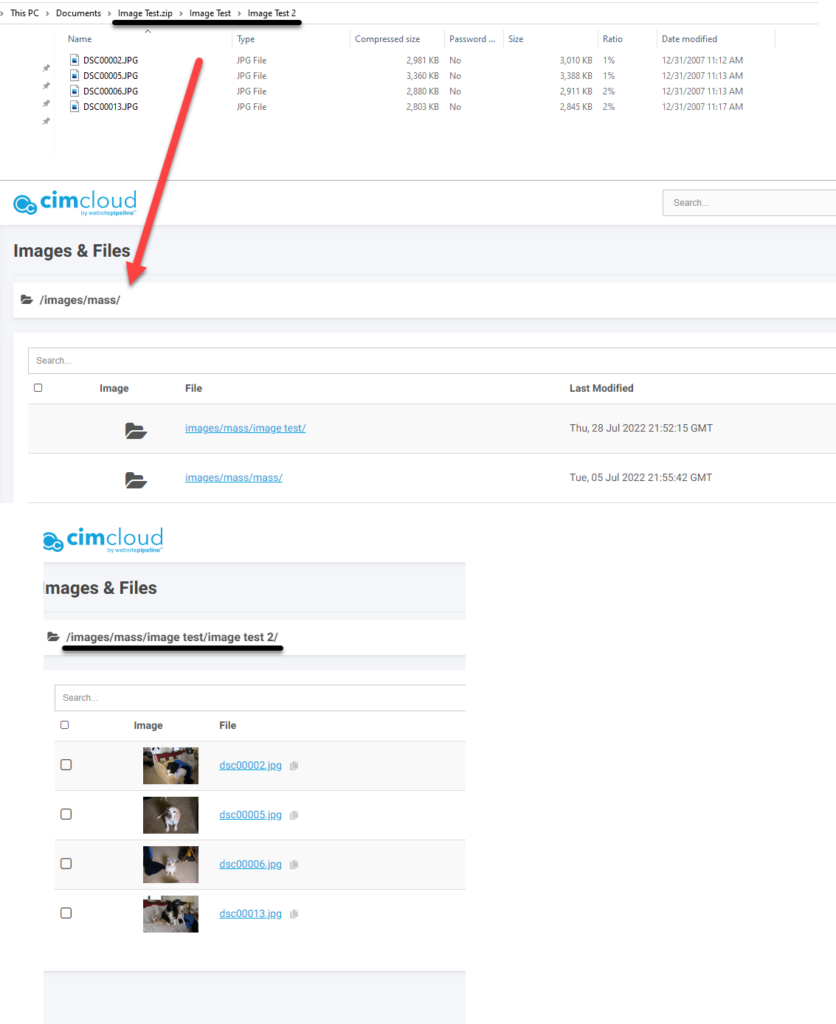
In the example screenshot below the desired images to upload were placed in a folder on the workers PC with structure: “Image Test > Image Test 2” with the images in “Image Test 2”. The zip file was created by zipping folder “Image Test”. The file was then uploaded while in folder “images/mass”. This resulted in the images being in the folder structure “images>mass>Image Test>Image Test 2”
Results:
An image or document has been uploaded by a worker into the Worker Portal to be used on the site.
Caching:
Images are are cached in the template and through the AWS image service. For more on caching see: Website Caching