Overview
This article provides a guide for disabling/deleting records to stay under the record count caps for Service Level 500 (Small Business Edition / SL-500).
The Small Business Edition is capped at 500 transactions per month and has record count caps for data storage. You can disable/delete records to say under the cap or move up to our standard edition / SL-1000. For more information, see Service Levels.
This article provides instructions for managing record counts directly in the Worker Portal as well as in bulk through spreadsheet (CSV) data import/exports.
In the Worker Portal
Worker Logins (cap of 5)
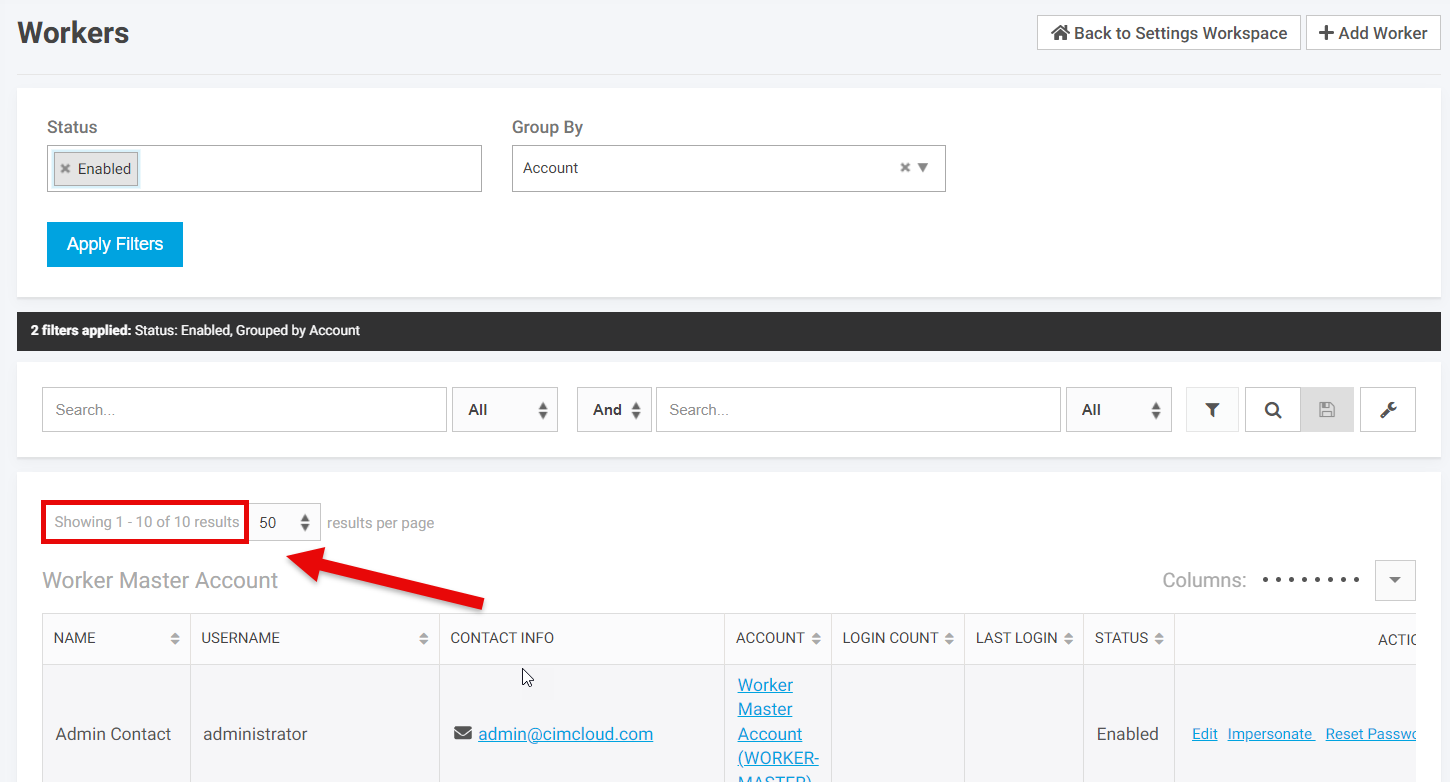
- Navigate to the Settings Workspace > Workers > Workers
- Note the number of enabled workers by filtering on “Status” and viewing the record count:
- Disable worker logins by clicking “Edit” under the “Actions” column and setting the “Status” to “Disabled”.
For the tables below, we recommend disabling records using a spreadsheet (CSV) import for efficiency.
Products (cap of 10,000)
- Navigate to the Product Workspace > Product Catalog > Products
- Similar to the Worker Logins above, note the number of enabled products by filtering on “Status” and viewing the record count
- Disable products by clicking “Edit” under the “Actions” column and setting the “Status” to “Disabled”
**Note: many of our customers manage their product statuses using a custom mapping to a field in their ERP system. This requires updating the data within your ERP and allowing the status to sync to the website.
Accounts (cap of 10,000)
- Navigate to the CRM Workspace > Customers > Accounts
- Similar to the Worker Logins above, note the number of enabled accounts by filtering on “Status” and viewing the record count
- Disable accounts by clicking “Edit” under the “Actions” column and setting the “Status” to “Disabled”
Customers / Contacts (cap of 10,000)
- Navigate to the CRM Workspace > Customers > Contacts
- Similar to the Worker Logins above, note the number of enabled contacts by filtering on “Status” and viewing the record count
- Disable contacts by clicking “Edit” under the “Actions” column and setting the “Status” to “Disabled”
Addresses (cap of 10,000)
- Navigate to the CRM Workspace > Customers > Addresses
- Similar to the Worker Logins above, note the number of enabled addresses by filtering on “Status” and viewing the record count
- Disable addresses by clicking on the linked Street Address column and setting the “Status” to “Disabled”
Using Spreadsheet (CSV) Data Imports/Exports
Each of the data tables above can be managed through spreadsheet (CSV) data import/exports. This allows you to export all records from the desired table into a CSV file, as well as update / delete records by importing a CSV file.
It is important to first read and understand how to use data imports/exports via the following article before attempting to make changes, as this tool allows updating/deleting large amounts of data – Managing Data Through Spreadsheet Imports.
The following grid provides the database table, user key, and status column needed to disable records by setting the status to ‘0’.
| Data to Manage | Table Name | User Key | Status Column |
|---|---|---|---|
| Worker Logins | customers | username | status |
| Products | products | sku | status |
| Accounts | accounts | ref_id | status |
| Customers / Contacts | customers | username | status |
| Addresses | shipping_addresses | id | status |
For example, the example CSV file below could be imported to the “products” table to disable a product with the SKU “abc”: